
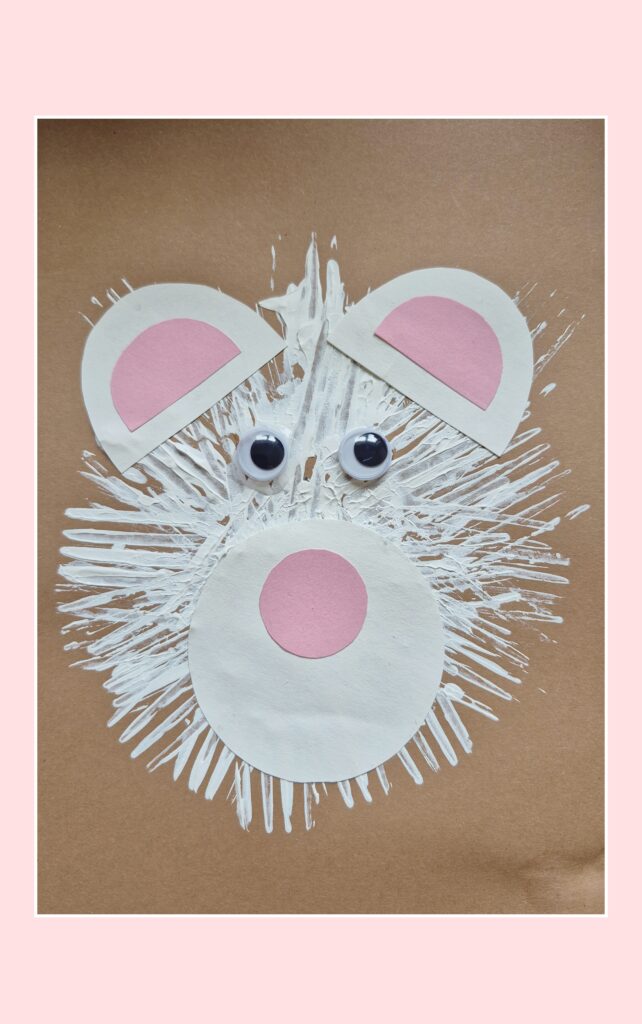
February is a perfect time to make some polar bears. In this craft, you will get to learn to paint with a fork and make a cute polar bear.
Materials:
Coloured paper
White paint
Fork
Tray for paint
Scissors
Glue
Googly eyes
Step-step-tutorial:
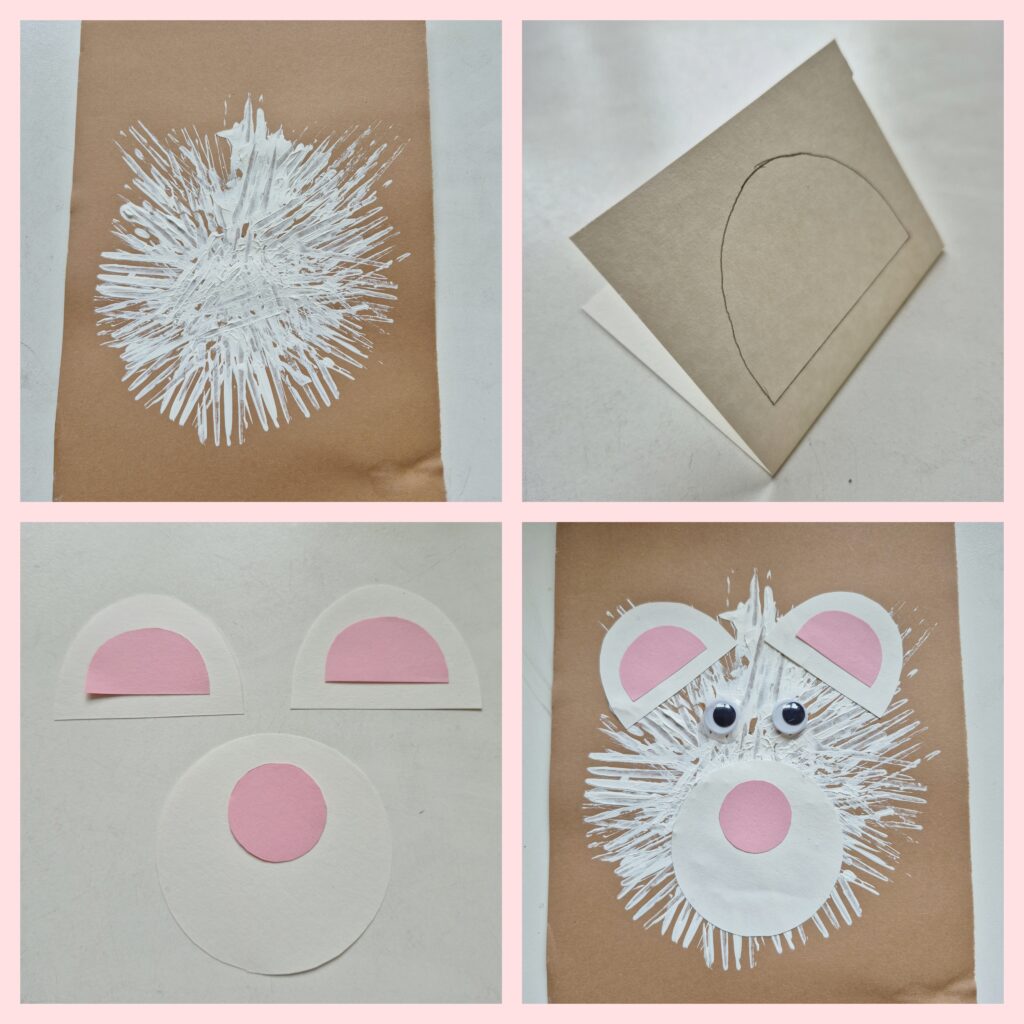
1, Apply some white paint into a tray. Spread the paint around so you get a good space to dip your fork.
2, Dip the fork in the paint and make a print on the coloured paper.
3, Keep making prints until you fill in a circle, then set the painting aside to dry.
4, Take a piece of white paper, fold it in half. Draw a big white bear ear on the white paper and cut it out. Hold both sides of the folded paper together when cutting, this will give you 2 identical ears.
4, Take a piece of pink paper and repeat exactly what you did with the white paper, but this time make the shape smaller so it fits inside the white years.
5, On a white paper draw a big circle that will be the bear’s cheeks.
6, On a pink paper draw a small circle for a nose.
7, Cut them out and glue on the bear.
8, Lastly you can add googly eyes. If you don’t have any, then you can draw your own.