
Learn about how positive and negative space and make your own painting. This craft is great for summer learning and summer fun of course. All you need is paper and some paint and your creative thinking. Get your materials and let’s get to work.

Materials:
Card paper
Paint
Pencil
Brush
Water
Glue
Black or any other coloured paper
Step by step instructions:
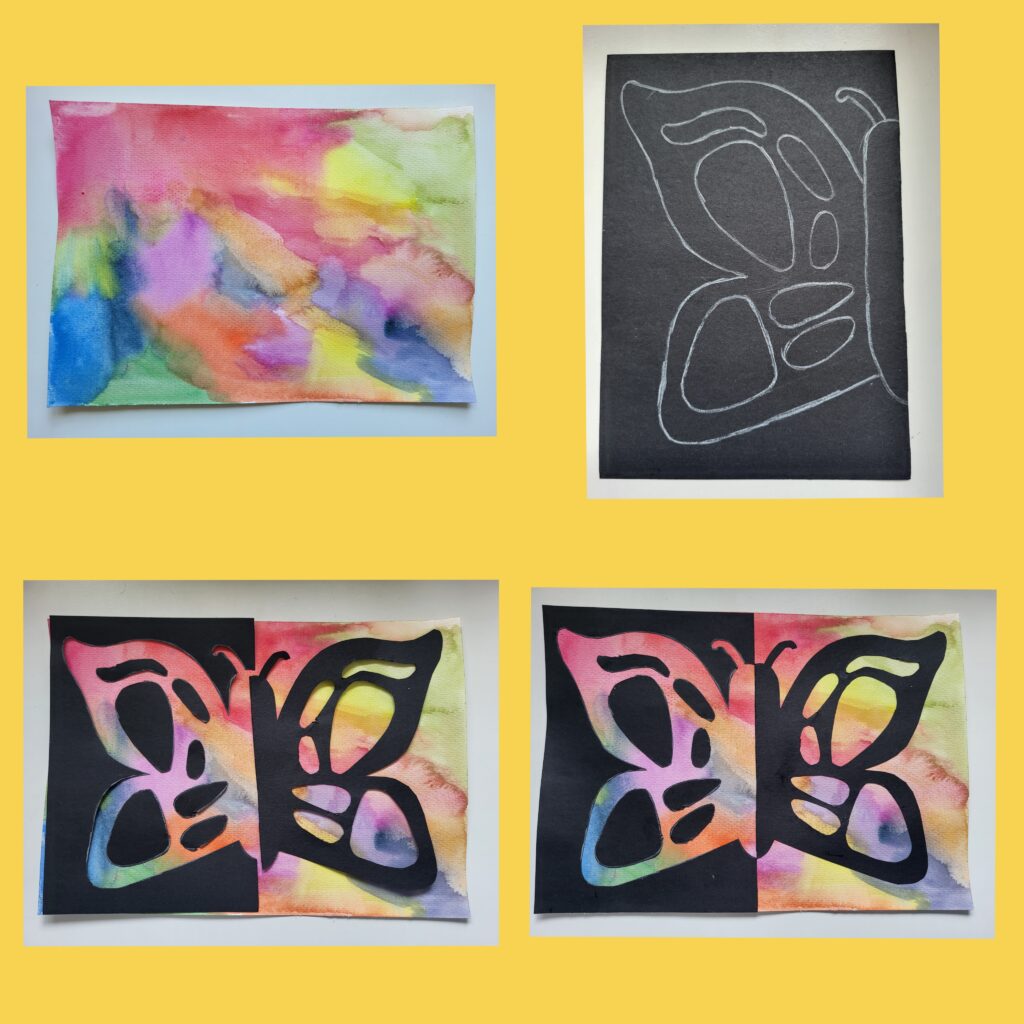
1, Take a card paper and your paints and cover the paper in bright colours. If you spray the page with some water the colours will blend together. Set this aside to dry.
2, Take a black sheet of paper, fold it and cut it in half. On one half of the paper draw a butterfly. Make you also draw some shapes inside of the butterfly on his wings. Also, remember we will be butting it out so make sure there is enough space between each piece you draw.
3, Cut out the butterfly and the inside pieces making sure you don’t cut through any of the edges.
4, You should have two cutouts, one is the outside outline of the butterfly and the second is the inside of the butterfly. Glue the outline to the painted page making sure the corners fit together.
5, Now glue the rest of the pieces on the second half of the painted paper and make sure the edges of the pieces line up as if you took the butterfly from the black page and flipped it on the other half of the paper.