
With all the plants growing and blooming outside it gives us great opportunity to teach our little ones about nature. This art project is a great opportunity to explore and imitate different plants they can see outside.
MATERIALS:
Cardboard
Green paint
Coloured paper
Scissors
Glue stick
Pencil
Ruler

Let’s craft this:
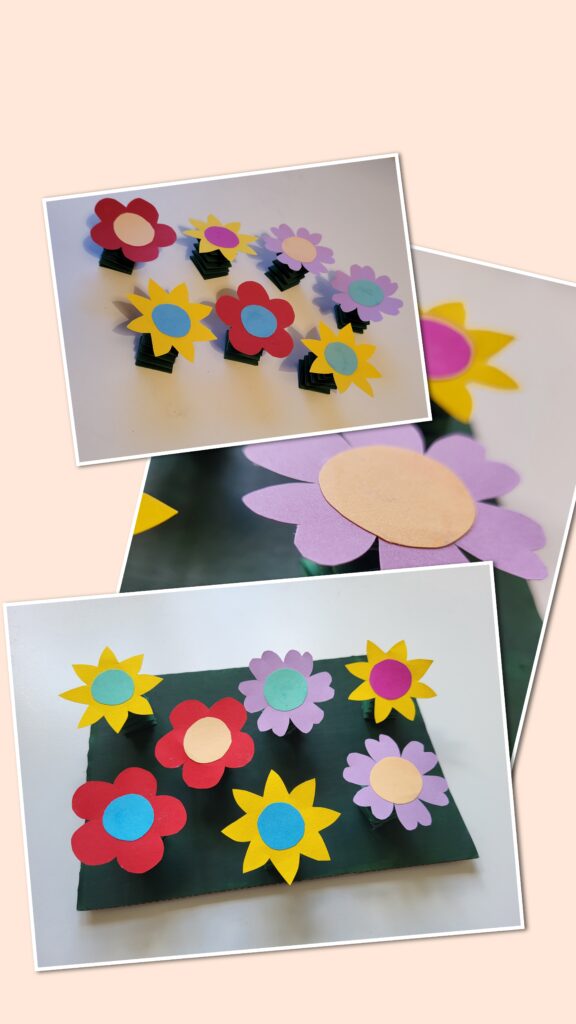
1, Take a cardboard and cut it into a rectangle you want your garden to be, then paint the top side with green paint and set it aside to dry.
2, Take coloured paper and cut out a few flower shapes and small circles for the inside of the flowers. The bigger your cardboard is the bigger the amount of flowers you will need.
3, Take a green paper, measure and cut 2 cm wide strips. Each flower needs two strips. If your flowers are smaller or bigger you may need to cut thinner or thicker strips of paper.
4, Take two strips and glue the ends together creating a V shape.
5, Keep bending the strips over each other to create a zig-zag harmonica. Use some glue at the end of the strips to finish it off.
6, Glue the flower on top of the harmonica and glue the other end to the cardboard.
7, You can make the harmonica stems shorter or taller and more wiggly.