
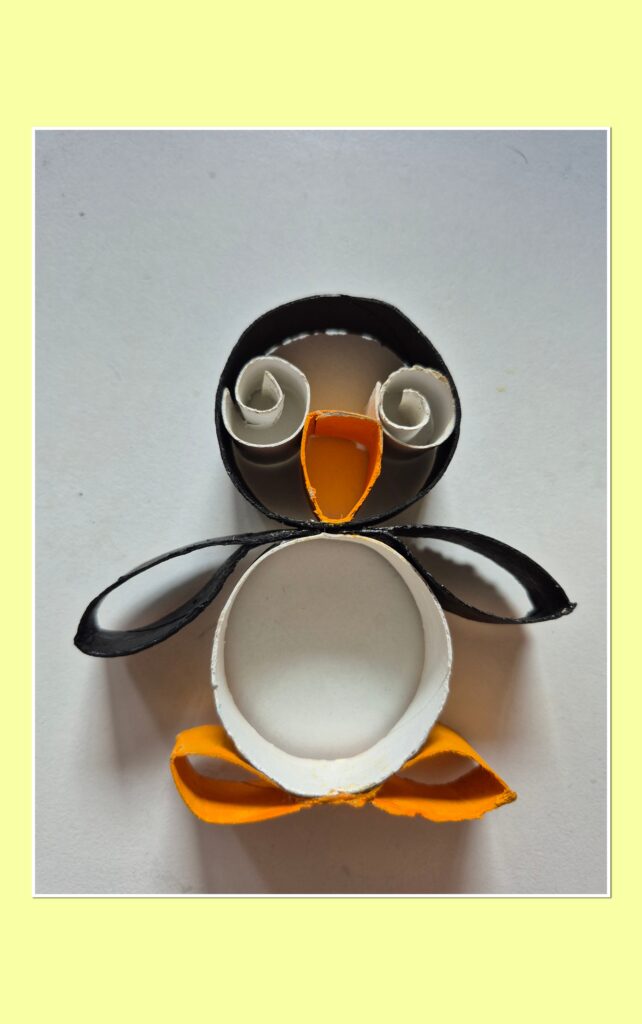
Do you have a collection of paper rolls hidden somewhere in the corner? Now it’s time to dig them out and make something out of them. Create these cute penguins that will brighten up your desk, window or shelf.
Materials:
Paper roll
Paints
Pencil
Ruler
Scissors
Brush
Glue
Step-by-step tutorial:
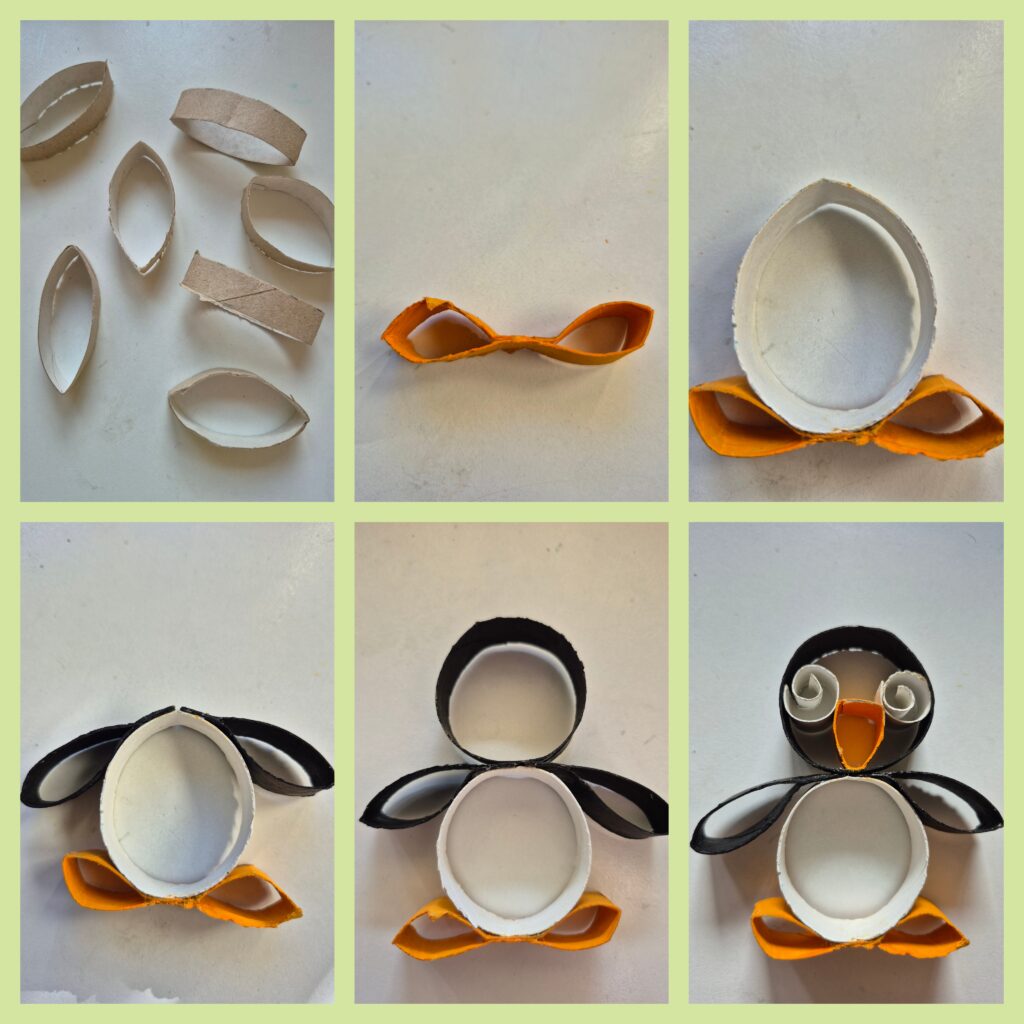
1, Take a paper roll, partially flatten it. Use a pencil and a ruler to divide the paper roll into 7 parts that are 1,5 cm wide.
2, Cut the paper roll into circles.
3, Paint the circles on the inside and on the outside. You will need 2 orange, 2 white and 3 black painted circles.
4, When the circles dry, take 1 orange circle and bend it into a number 8 symbol and glue it together in the middle. You may need to hold it or clip it together with a small pin until the pieces stay in place.
5, Take 1 white circle and form it into a round shape and glue it on the top of the orange piece.
6, Take 2 black circles and cut them up in one of the corners. Now form each one of them into a wing shape, then glue the wings on the sides of the white circles.
7, Take another black circle and make it round. Glue this circle on the top in the middle of the wings.
6, To make the beak, cut up half the orange circle and shape it into a triangle, glue it inside the penguin’s head.
7, To make the eyes, cut up one white circle into 2 halfs and roll each of them very tightly, then glue them inside the penguin’s head. Depending on the size of the head, you need to unroll the eyes a little bit so they are touching the side of the circle and the beak. This will help the beak and eyes stayin place.