
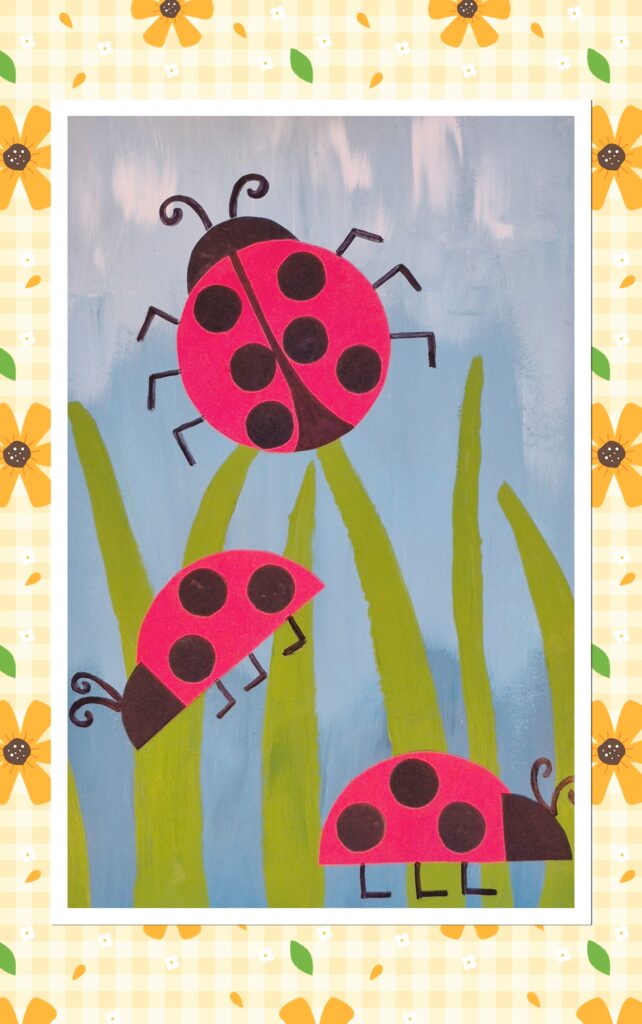
In the springtime, all the bugs and animals come out and we can see them way more often. One of them is also ladybirds. Let’s get out some paint and paper and paint a garden full of ladybirds.
MATERIALS:
Paper
Paints
Brush and cup for water
Coloured paper
Scissors
Pencil
Marker
Glue
STEP-BY-STEP TUTORIAL:
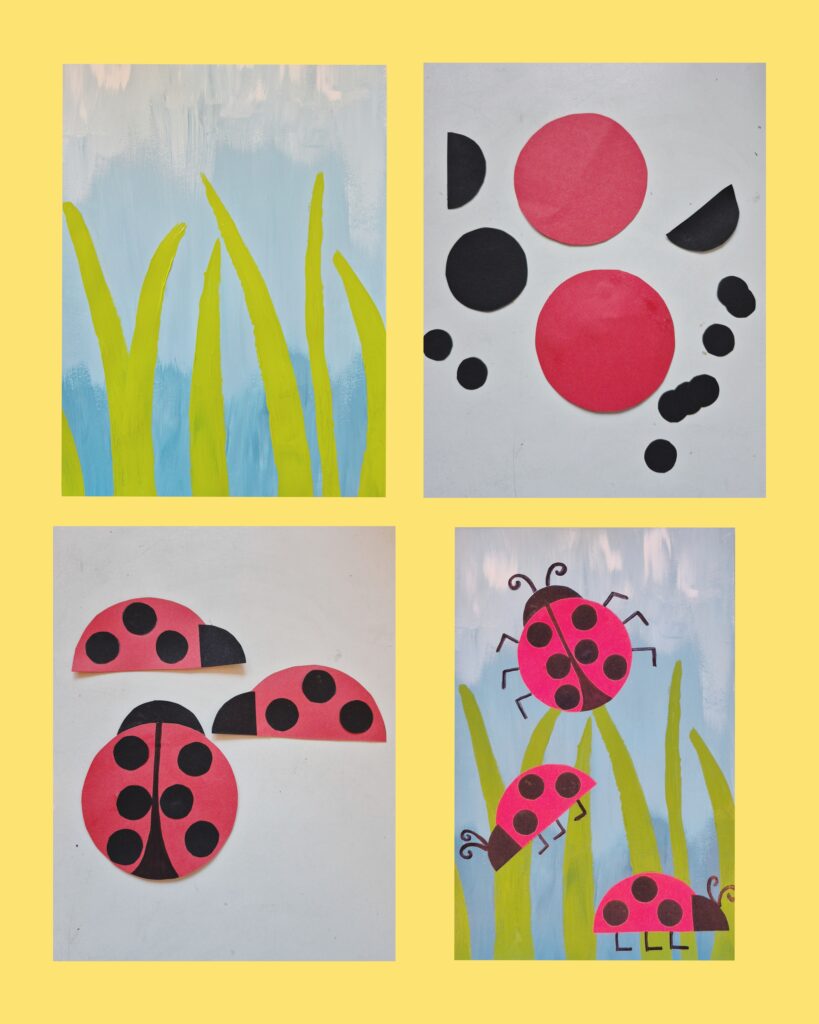
1, Take a sheet of paper and paint it blue as the sky. You can paint the top lighter and the bottom darker to make it more realistic or add a sun.
2, You also need to draw some long grass stems, then let the whole painting dry.
3, Draw a few red circles and cut them out. You can keep the circle full to make a ladybird from the top or cut the circle in half to make 2 ladybirds from the side.
4, You also need to cut out small black circles to make spots on the ladybird. For younger kids, it will be easier to use a marker to draw the spots.
5, Cut out a small half circle from black paper to make the ladybird’s head and glue all the pieces together.
6, Glue the ladybirds on the grass, then take a marker and draw antennas and feet.